Friday, October 31, 2008

Spooky Bee Girl


This is one of my 7-month-old triplet great-nieces in her Halloween costume. She was ecstatic about being a bee! Her two sisters, not so much.

--------------------------------
First attempt at a portrait
4" x 6" watercolor on wc paper


I know this is a bit repetitious, but here is the journal page for today. I printed out a copy of the the original painting using a color printer and regular copy paper and glued it in my journal. It may not last, but eh. There it is.


Had to go in and digitally edit out the baby's real name. Her bloggity name is "Butterbean."

EDM #2 - Draw a Lamp

Monday, October 27, 2008

Domestication

Teeny Tiny Sketchbook Cover Instructions

The following instructions are how to make the yellow sketchbook cover on the left.

The instructions for making the paint blob cover on the right are here, and instructions for folding the paper for the pages are here.


MATERIALS NEEDED

Scissors, glue, pencil, paper scoring tool, cardstock and a ruler. I used a ZIG glue pen because that's what I had on hand. The bright green thing is a paper scoring tool, but a dull letter opener (shown), or a dull butter knife will work fine. Just don't use anything sharp that might cut into the fiber of the cardstock.

I used 9x12" watercolor paper for the pages (90 lb Canson cold press) so the folded paper block ended up being 2.25x3". An 8x8" piece of cardstock was the perfect size for the cover. If you use a larger sheet of WC paper for the pages you will need larger cardstock. The cover cardstock should be almost three times the height and width of the folded paper block.


THE CONCEPT

Each side of the cover is basically an envelope. The first and last page of the paper block slides into each side.


Cut and fold this shape, then glue together the flaps on each side.


DETAILED INSTRUCTIONS

Measure and mark a 1.25" strip across the bottom for the strap.

Hold the paper block on its spine in the approximate middle of the remaining space. Exact measurements aren't critical here. I just eyeballed it. Draw a loose pencil line all the way around. Again, precision isn't critical here. I've done it with a black marker so it would show in the photo. This will be the spine area of the sketchbook.


Cut the strap portion off and set aside for later.

Just a smidge outside the drawn spine block, score a line all the way across the cardstock. Do this on all four sides. How big the "smidge" is depends on how much larger you want the cover relative to the pages. Err on the side of larger rather than smaller. If the cover is too close to the measurement of the paper block pages, the pages will be difficult to slide in.

CRITICAL: ALL SCORED LINES MUST BE ABSOLUTELY PARALLEL TO EACH OTHER AND THE EDGES OF THE CARDSTOCK.

That's the only critical part of the whole project. If the lines are not parallel, the cover will be a whomperjawed mess. Measure and score carefully.

The scoring lines are shown below in red (and black).


Lay the paper block down against the spine line and mark just beyond the edge of the pages. This will mark the width of the cover. Do this on both sides.

Score a line through that mark all the way across the cardstock. The project should now look like this:


Cut the corners off and cut down to the spine block on the top and bottom. There needs to be a little "ease" in the cuts because of the thickness of the cardstock. The eased cutting lines are shown below as dashed green lines. Click to embiggen:


After cutting it should look like this:
You might notice the bottom flaps are a little larger than the top flaps, and one side flap is larger than the other. Not a problem; don't worry about it.

Fold along all the scored lines and crease them sharply. I used the handle of the letter opener for this.


Determine which set of upper or lower flaps are larger and re-orient the project so they are at the top. The closer the edge of the top flap is to the bottom of the cover, the neater it will look.

All the flaps numbered for reference:


Fold up all the flaps in order. Then fold each side of the cover over onto the other to make sure it folds over flat. The inside edge of the flaps next to the spine may need to be trimmed to prevent bunching. Check the outside edges of the flaps to see if they need any trimming.


Glue the spine flaps to the spine - Bottom one (1) up first, then top one (2) down:


Fold in side flap (3) and fold bottom flap (4) over it. Make a mark where the two meet on the side flap.


Put glue on the side flap only in the area below the mark and glue the bottom flap to it. Let dry. Be sure not to get glue anywhere in Area B or the "envelope" will be glued shut!


Fold the top flap down and mark the edges. Open and apply glue on side and bottom flaps within the marks. Oops! I didn't do this step before I markered the glue lines.


I would have had a mess with a bunch of gummy glue hanging out.


Repeat the gluing process for the other side. The cover is complete.

Slide the paper block into the cover.


The sketchbook is complete!


THE STRAP CLOSURE (optional)

This is just a simple glued band of cardstock.

Wrap the strap around the book as tightly or loosely as you prefer. Allow about one and a half inches overlap for gluing. Mark the end for cutting.


Add decoration and glue together.


Slip the strap around the sketchbook and you're done!


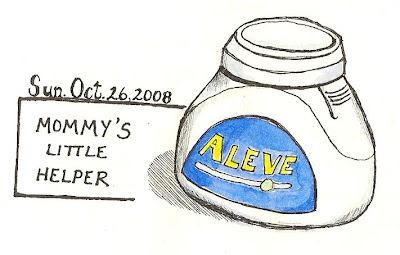
Sunday, October 26, 2008

Mommy's Little Helper


Another long day of ripping out sheetrock and the fortyleven thousand nails that held it in place.

I'm getting too old for this.

Saturday, October 25, 2008

Friday, October 24, 2008

Thursday, October 23, 2008

Midnight Doodles

There are some nights where my brain is tired but I still have a load of creative energy. What to draw? What to draw?

I drew the thing at hand - a pair of fingernail clippers. This is a top-down view, drawn with a ballpoint pen.


I'm trying to make the ballpoint pen drawings look like a photograph. I've seen it done. I have a long way to go.

I was frustrated with the way the clippers came out but I still had the need to draw. I didn't want to draw a 'thing' and try to make it look like the thing it was so I just doodled. Lots and lots of doodling.


I like the bits on the left that look like soapsuds on mushrooms. I thought that came out neat looking so I added a clip of it as the blog header today.

Wednesday, October 22, 2008

Meager Supper


Phooey. The scanner won't pick up any of the grays in this. All the shadows look kind of a dirty sandy brown color. Sigh.

Imagine a nice, crisp gray on the inside of the bowl, along the bottom of the bowl, and around the top of the can. The red and gray color combination works much better than red and sand. Sigh.

Tuesday, October 21, 2008

New Palette

6"x8", graphite pencil in small sketchbook

This is a new palette for me, purchased recently at Goodwill for 50 cents. I got two actually. It's actually a divided melamine picnic plate, but it will do just fine for a cheap palette.

Since I have only six tubes of watercolor paint I need lots of territory for mixing. I already have two of the round, plastic, 10-cup palettes, but somehow that doesn't seem to be enough.

I had a devil of a time trying to get a good scan of this sketch. Apparently scanners don't play well with graphite. Maybe because it is too reflective or something. I don't know. Anyway, the actual sketch looks far better and much less grainy and whomperjawed.

Sigh. I actually do a decent drawing and I can't seem to get it shared. Sigh.

Monday, October 20, 2008

Teeny Tiny Sketchbooks


These are two teeny tiny sketchbooks I made using a single sheet of accordion folded paper for the pages. The pages are removable from the covers so the paper can be turned over and used on the other side. Or each little page can be cut from the larger one to give away.

I thought these would be convenient to toss in my purse for those times when I'm out and get seized by the sudden need to sketch. LOL!

The yellow one has pages made from a 9x12" piece of watercolor paper, good for sketching and adding watercolors later. The cover is made from a piece of 8x8" craft cardstock. I had a strip of cardstock left over, so I made a strap thingy to keep it closed. It looked sort of like a wallet at that point, so I drew stitching on it just for grins.

The smaller one has tan colored 8x11" printer paper as pages, good for jotting down notes, phone numbers, grocery lists, etc. It has a much simplier cover than the yellow one made from a 4x6" scrap of watercolor paper I was using to test my paint mixes. I was going to throw it away, but since it was nice heavy paper, decided to re-purpose it as a cover. I drew around all the little paint blobs with a Pigma Micron pen and tried to make them into something interesting.


I don't know if I'll actually put these to use because I'm not sure they will be practical, but ya never know. I thought they came out cute as a button.

Finished size is a dab over 2x3".


Instructions on how to fold the pages by Nina Johansson

Instructions for the paint blob cover by Po Timkin

Instructions for the yellow cover by Speck

Sunday, October 19, 2008

Church Chimes at Sunset

Tonight I heard the neighborhood church chimes. It was a magical moment like the world had paused for a moment to listen. I wondered how I could capture the sound of chimes in paint. Couldn't figure that out so I tried to capture the wonderful lavender sunset so I could remember the chimes.


Watercolor #5
Original artwork: 4" x 6"; on watercolor paper
Digitally edited to 2.25" x 3.25"


When I saw the sunset sky, it was framed by the black silouette of the neighbor's house and trees. It was a brilliant lavender color shining brightly through the darkness. It really drew my attention to the spot.

That's how I painted it.


But this looked way too gloomy and murky and the sunset was NOT the focus. Thank goodness for the ability to digitally edit. Once I got rid of most of the unimportant swamp slime, the sunset really did turn out well.

The little moon shape right over the trees was a boo-boo. I didn't notice it until after I had scanned and cropped the painting. I guess a drop of water got on it and lifted the paint without me realizing it.

I guess that little moon wanted to live in this painting.

Dirty Laundry

I purchased a cheap little journal for $3.00 two weeks ago and have been writing all my deepest, darkest secrets in it. For such a cheap journal it has amazingly nice paper in it.

It seemed a shame to just write words and only words in there. I thought I would give a go to the "illustrated journal" concept that a lot of the folks in the sketch group do. My entry for today:


Even though it is nice to have a spot of color in the journal, this idea doesn't melt my butter. It seems rather contrived or something. I think this idea is what the "Everyday Matters" group is based on.

Will have to give this concept more thought.

Friday, October 17, 2008

Hook for Airships

Because Fred wanted the Extreme Close-ups to be a hook for airships.


4" x 6", watercolor on wc paper.

There is actually a light blue wash for the sky and fluffy clouds too. The scanner just didn't pick them up.

Used a wet-on-wet technique for painting the sky without brush marks. Painted the entire area with clean water, then brushed on the paint. Worked like a charm. This is probably a Watercolor 101 technique, but I didn't know about it.

Made the clouds by dabbing the wet paint with a ball of tissue. Cool. Easy. Saw that done on a video on the Painting and Drawing Channel.

I made a boo-boo when I tried to add the shadow for the airship on the ground. I had estimated the light to be coming in from above left, so the shadow should have been slightly to the right. Well, it looked all wrong. I tried to get the paint up but was not entirely successful. Phooey. The shadow looked 'righter' under the blimp.

This is my 4th watercolor painting.

EDM #193 - Extreme Close-Up

Weekly Challenge:
"Draw a small part of an everyday object, but not the whole thing. The fun comes from guessing from each other's drawings what the object is."


Can you guess what it is???

Read what the folks in the EDM group guessed here.


The next version started as my original sketch using colored pencils. It just wasn't melting my butter so I abandoned it early on for the pen and ink version. I was going to toss it but decided to use it for watercolor practice instead.


Monday, October 13, 2008

Blue Trees

Original pen and ink drawing in the sketchbook:


Copy - painted with watercolors and re-inked:

Saturday, October 11, 2008

New Art Supplies

(click to embiggen)

...or how to make something out of nothing. I had a few tiny doodles that I liked on two whole pages of crap. I cut them out, glued them in the big sketchbook, and went wild with pens and colored pencils. There is actually more color on the page than shows up on this scan. I need a better scanner.

Friday, October 10, 2008

Quicky Triplets

A quick digital doodle as an illustration for "Baby Wrangling."

Tiny Watercolor Doodles


Still experimenting with watercolors. I can't seem to reconcile myself to the fact watercolor paintings should have soft edges. I like black lines, really I do.

--------------------------------
each about 2" x 2" on copy paper
watercolors and Pigma Micron 005 pen